Using modules in a shiny app
a02-using-shiny-modules-in-shiny-app.RmdIntroduction
In this vignette we will discuss how to use various shiny modules in a shiny app. The shiny app exists out of two components: the UI, and the server:
server <- function(input, output, session) {

}

UI <- shiny::fluidPage(

)

if (interactive()) {
  shiny::shinyApp(ui = UI, server = server)
}
These two components will be the foundation of our shiny app.
Adding a module
Let’s add a table containing the iris data. First we
need to create a Table module:
library(DarwinShinyModules)

table <- Table$new(data = iris)

table
#> <Table>
#>   Inherits from: <ShinyModule>
#>   Public:
#>     async: active binding
#>     bindings: active binding
#>     clone: function (deep = FALSE)
#>     data: active binding
#>     filter: active binding
#>     getReactiveValues: function (session = getDefaultReactiveDomain())
#>     initialize: function (data, title = NULL, options = list(scrollX = TRUE),
#>     instanceId: active binding
#>     moduleId: active binding
#>     moduleName: active binding
#>     namespace: active binding
#>     options: active binding
#>     parentNamespace: active binding
#>     reactiveValues: active binding
#>     server: function (input, output, session)
#>     title: active binding
#>     UI: function ()
#>     validate: function ()
#>   Private:
#>     .async: FALSE
#>     .bindings: reactivevalues
#>     .data: data.frame
#>     .filter: top
#>     .init: function (session)
#>     .instanceId: SwlKLU5Ed6ieYxombQ_X
#>     .moduleId: Table-SwlKLU5Ed6ieYxombQ_X
#>     .moduleName: Table
#>     .namespace: Table-SwlKLU5Ed6ieYxombQ_X
#>     .options: list
#>     .parentNamespace: NULL
#>     .reactiveValues: list
#>     .server: function (input, output, session)
#>     .title: NULL
#>     .UI: function ()
#>     assertInstall: function (pkgName, version)
#>     checkMethodOverrides: function ()
#>     dlContent: function (file)
#>     dlFilename: function ()
#>     downloader: function (output)
#>     finalize: function ()
#>     makeInstanceId: function (n = 20)
#>     renderTable: function (output)
#>     setBindings: function (input)
#>     setDotArgs: function (...)
The table module is an R6 class and contains various
public and private fields and methods. Some of these are specific to the
Table module. But most of them are present in all
DarwinShinyModule modules. All modules have a
server() and UI() method. These methods are
used make the shiny app function, and may be used on their own by
shiny::shinyApp(). This makes each module essentially a
tiny stand-alone shiny app.
To integrate our module in our own shiny app, all we have to do is
add the UI() and server() method calls to our
own shiny app:
server <- function(input, output, session) {
  table$server(input, output, session)
}

UI <- shiny::fluidPage(
  table$UI()
)

shiny::shinyApp(ui = UI, server = server)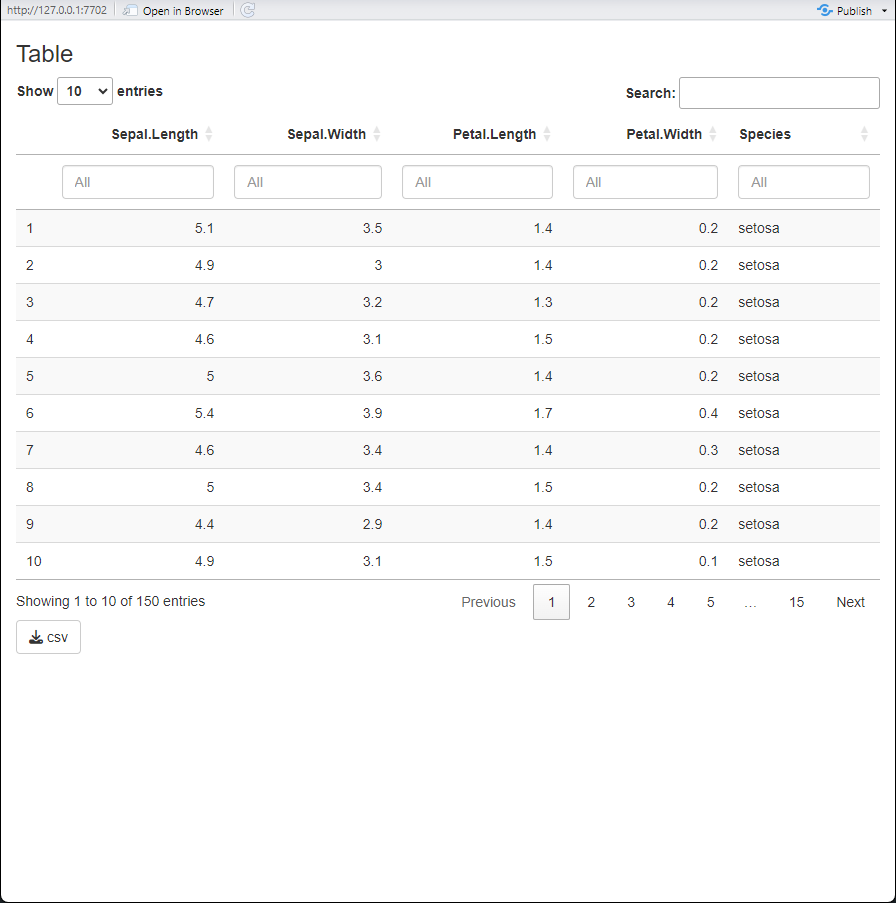
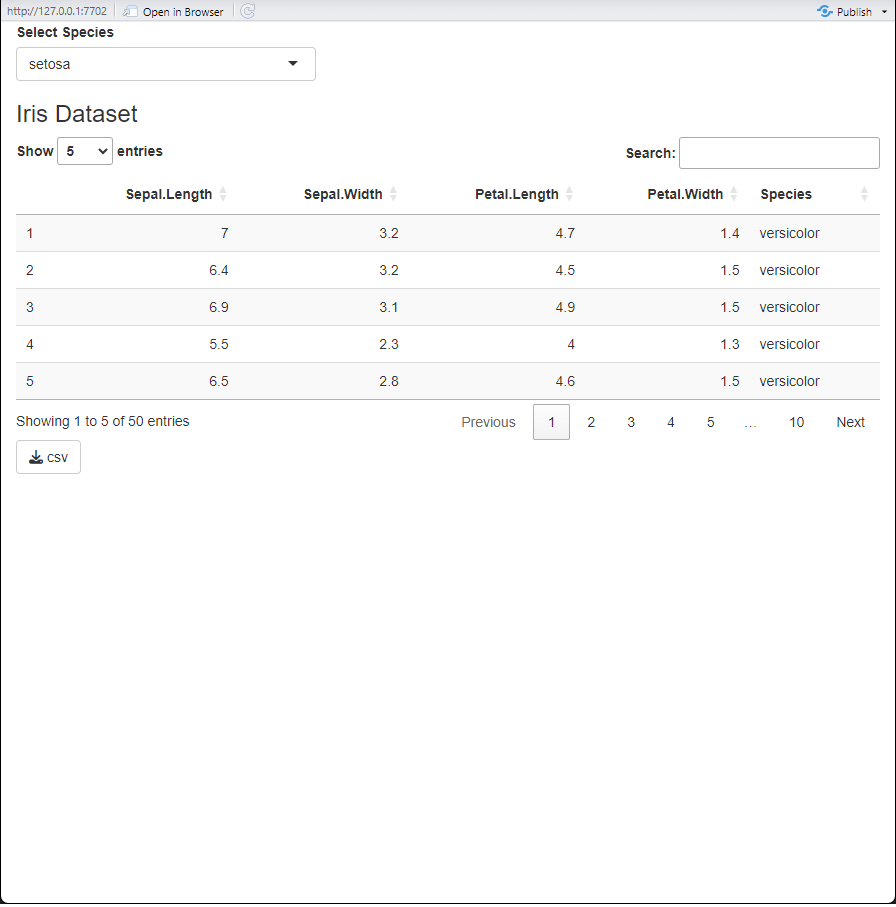
We have some arguments to customize our table, title,
options, filter. The options and
filter arguments are DT arguments to add extra
options, or to have control over the filtering.
table <- Table$new(
  data = iris,
  title = "Iris Dataset",
  options = list(pageLength = 5),
  filter = "none"
)

server <- function(input, output, session) {
  table$server(input, output, session)
}

UI <- shiny::fluidPage(
  table$UI()
)

shiny::shinyApp(ui = UI, server = server)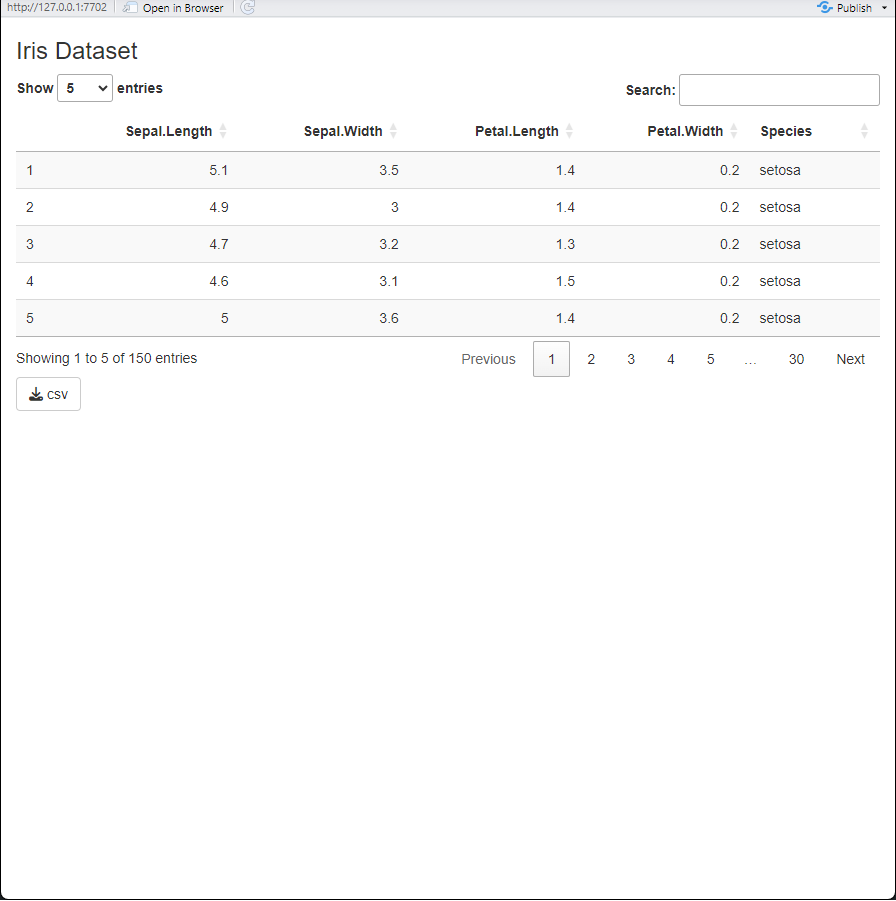
Maybe we don’t like the standard filtering that DT
provides, let’s add an InputPanel module. The
InputPanel module requires a named list of
xInput() functions and a named list of their corresponding
arguments. The upside of this is, that if you may add an input function
from another package, without breaking compatibility.
inputPanel <- InputPanel$new(
  funs = list(
    inputSpecies = shiny::selectInput
  ),
  args = list(
    inputSpecies = list(
      inputId = "inputSpecies",
      label = "Select Species",
      choices = unique(iris$Species),
      selected = unique(iris$Species)[1]
    )
  )
)

inputPanel
#> <InputPanel>
#>   Inherits from: <ShinyModule>
#>   Public:
#>     args: active binding
#>     async: active binding
#>     clone: function (deep = FALSE)
#>     funs: active binding
#>     getReactiveValues: function (session = getDefaultReactiveDomain())
#>     initialize: function (funs, args, growDirection = "vertical", ...)
#>     inputValues: active binding
#>     instanceId: active binding
#>     moduleId: active binding
#>     moduleName: active binding
#>     namespace: active binding
#>     parentNamespace: active binding
#>     reactiveValues: active binding
#>     server: function (input, output, session)
#>     UI: function ()
#>     update: function (fun, name, ...)
#>     validate: function ()
#>   Private:
#>     .args: list
#>     .async: FALSE
#>     .funs: list
#>     .growDirection: vertical
#>     .init: function (session)
#>     .instanceId: uRHfdV8IyvQgF7i1jX4q
#>     .moduleId: InputPanel-uRHfdV8IyvQgF7i1jX4q
#>     .moduleName: InputPanel
#>     .namespace: InputPanel-uRHfdV8IyvQgF7i1jX4q
#>     .parentNamespace: NULL
#>     .reactiveValues: list
#>     .server: function (input, output, session)
#>     .UI: function ()
#>     assertInstall: function (pkgName, version)
#>     checkMethodOverrides: function ()
#>     finalize: function ()
#>     makeInstanceId: function (n = 20)
#>     setDotArgs: function (...)
#>     updateIds: function ()
Before we add our InputPanel let’s see what it contains.
It again has a server() and UI() method, but
it now also has a inputValues active binding.
inputValues is a reactive environment, where the input is
stored from all the added xInput() functions. The reference
for each value is the specified inputId in the
args arguments list when creating a new
InputPanel module.
Again we can add the server() and UI()
method calls to our shiny app. Note that the UI is rendered first come,
first serve:
server <- function(input, output, session) {
  table$server(input, output, session)
  inputPanel$server(input, output, session)
}

UI <- shiny::fluidPage(
  inputPanel$UI(),
  table$UI()
)

shiny::shinyApp(ui = UI, server = server)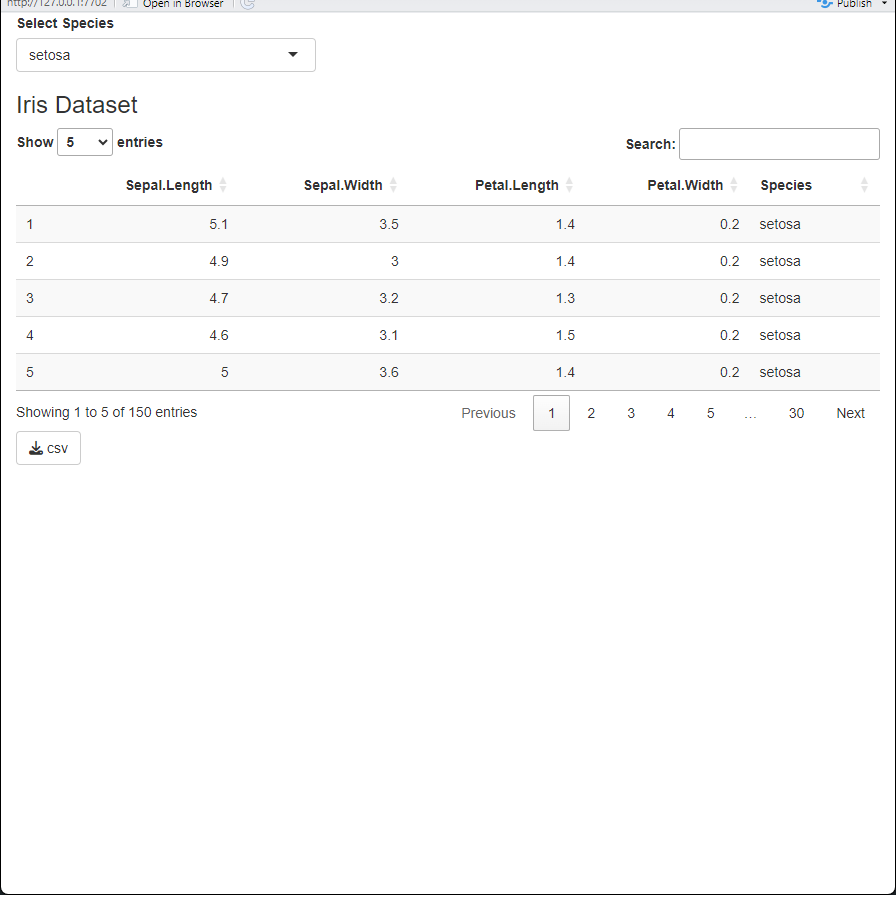
Initially the selection input shows the correct thing, but doesn’t
actually filter the data in the table. We have to update the data in the
Table module.
server <- function(input, output, session) {
  table$server(input, output, session)
  inputPanel$server(input, output, session)

  # The `inputSpecies` reference is availible in the reactive `inputValues`
  # envrionment in the `inputPanel`.
  shiny::observeEvent(inputPanel$inputValues$inputSpecies, {
    # We update the data in the `table` module
    table$data <- iris %>%
      dplyr::filter(.data$Species == inputPanel$inputValues$inputSpecies)
  })
}

UI <- shiny::fluidPage(
  inputPanel$UI(),
  table$UI()
)

shiny::shinyApp(ui = UI, server = server)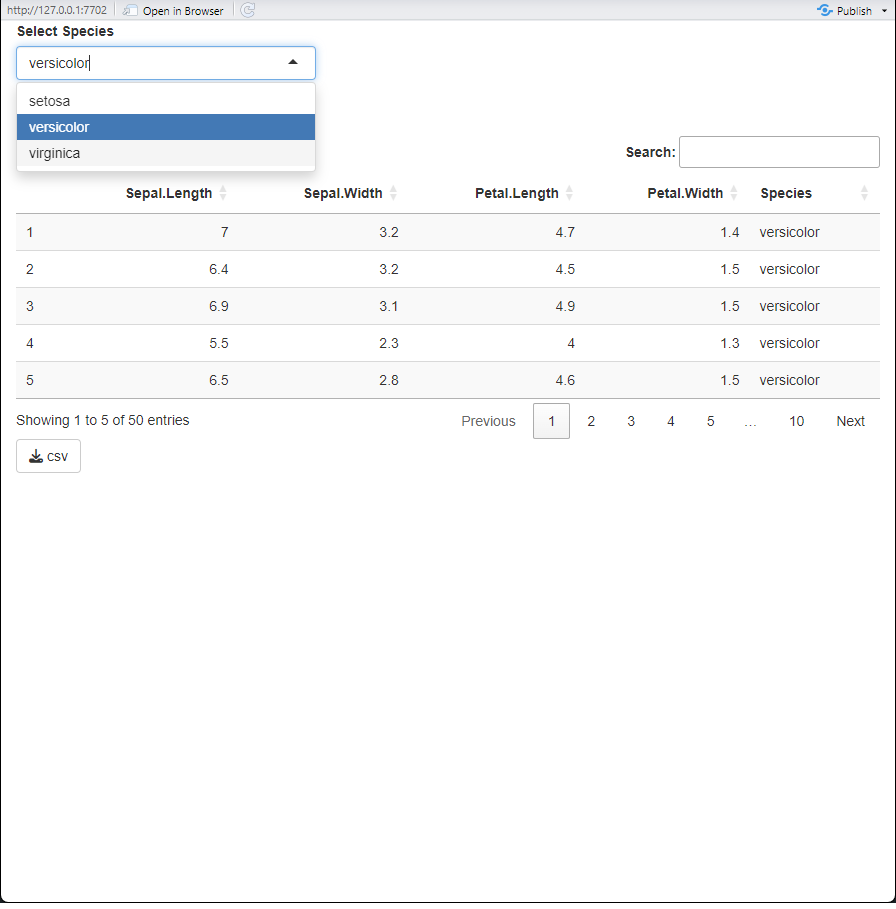
With some minor overhead we can make two modules communicate data between one another.
The Bridge Module
The Bridge module is a type of module that contains
other modules, and “bridges” them together. We can use the code in the
previous example, and implement it as a Bridge instead.
This has the upside that we can nest two or more modules together, and
package them up in a new module, which will then behave as any other
module.
Lets first initiate our Bridge module with out any extra
code. This will simply execute the UI() and
server() methods, without any interaction.
To make the inputPanel and table modules
interact, we have to provide a function that makes them interact. We
specify the function as a regular shiny server() function.
This function is executed with the server() methods of the
modules.
bridgeFun <- function(input, output, session) {
shiny::observeEvent(inputPanel$inputValues$inputSpecies, {
table$data <- iris %>%
dplyr::filter(.data$Species == inputPanel$inputValues$inputSpecies)
})
}
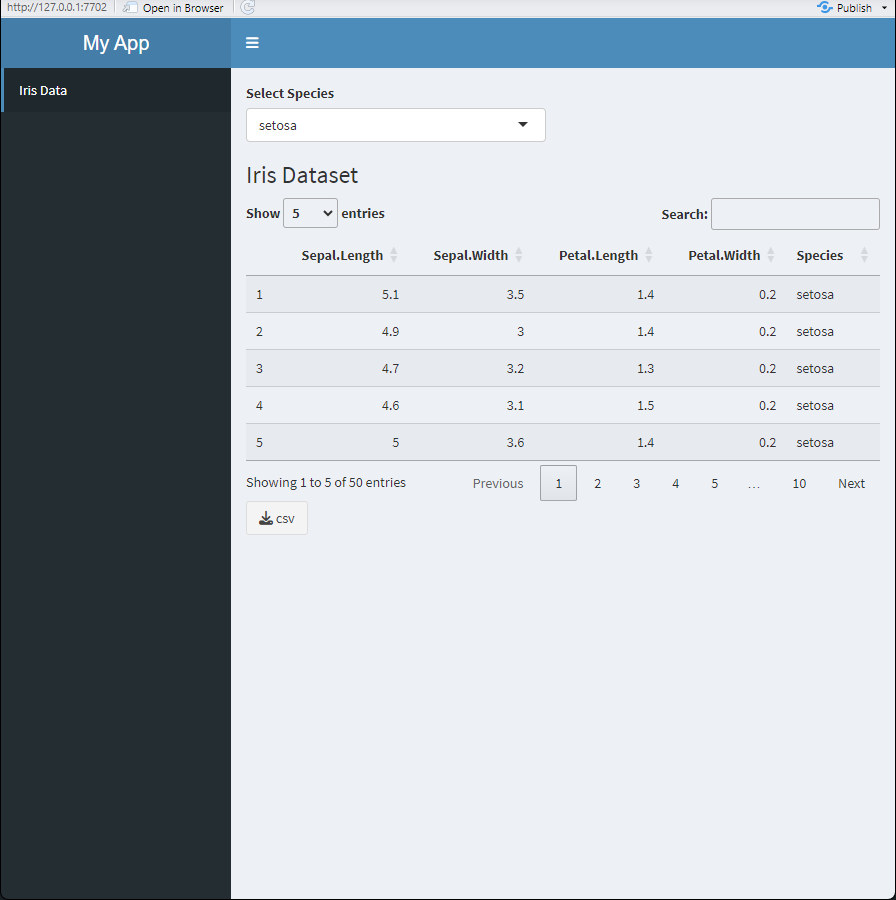
bridge <- Bridge$new(inputPanel, table, bridgeFun = bridgeFun)We can then use our Bridge module, like any other
module.
preview(bridge)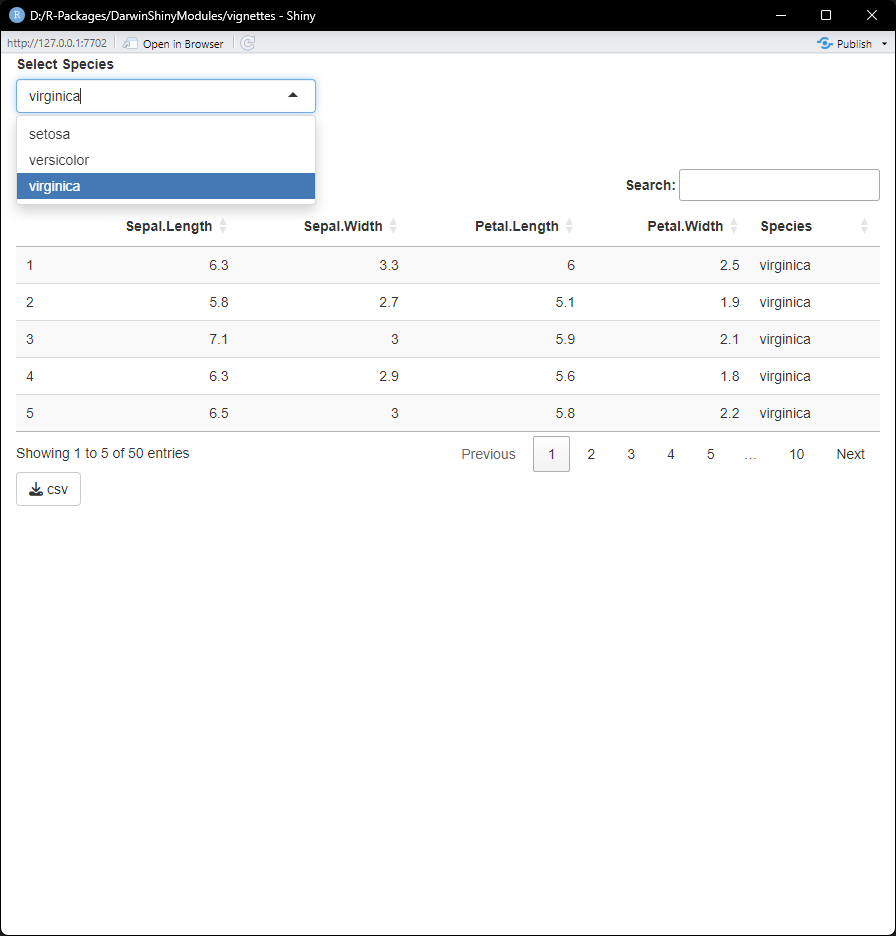
Or use it in any bespoke shiny app.
library(shinydashboard)
library(shiny)

ui <- dashboardPage(
  header = dashboardHeader(title = "My App"),
  sidebar = dashboardSidebar(
    sidebarMenu(
      menuItem(text = "Iris Data", tabName = "bridge")
    )
  ),
  body = dashboardBody(
    tabItems(
      tabItem(
        tabName = "bridge",
        bridge$UI()
      )
    )
  )
)

server <- function(input, output, session) {
  bridge$server(input, output, session)
}

shinyApp(ui, server)